Nu Beginnings - My First Gundam Build
06 Jul 2024 • 7 minutes read
What started as a simple curiosity soon turned into a passionate project that consumed my weekend. Join me as I dive into the intricate world of Gundam model building, one piece at a time. In this blog post, I'd like to share my learnings in user experience, gamification, and some of my ramblings about hobbies in general.

Table of Contents
The Spark of Interest
I always wanted to build my own Gundam. I recall watching characters in the anime, build three-dimensional models from almost flat, 'two-dimensional' runners. The fact that there would be no glues or any other forms of adhesives involved was all the more surprising.
Back in 2015, I was part of Rakshak, IIT Bombay, where we built RC planes from scratch. During that time, I was bitten by the Gundam itch, but considering my student allowances and the high cost of Gundams (I recall HG RX-78 being 7.5k INR), it was an unattainable hobby.
Fast forward to 2024. I had moved on from this dream, now older and much busier with life and adult responsibilities. I had not considered purchasing a Gundam until my brother gifted me one for my birthday.
Choosing the Gundam
Luckily, I didn't have to go through the headache of choosing the model. My brother got me an RG (Real Grade) RX-93 Nu Gundam, which is regarded as one of the best Gundams. You can watch this review that convinced my brother to get this particular Gundam. Alternatively, you could go with an HG (High Grade) RX-78].
While this isn't a beginner's guide, my only advice is to get something in HG or RG. The newer the model, the better its quality and engineering.
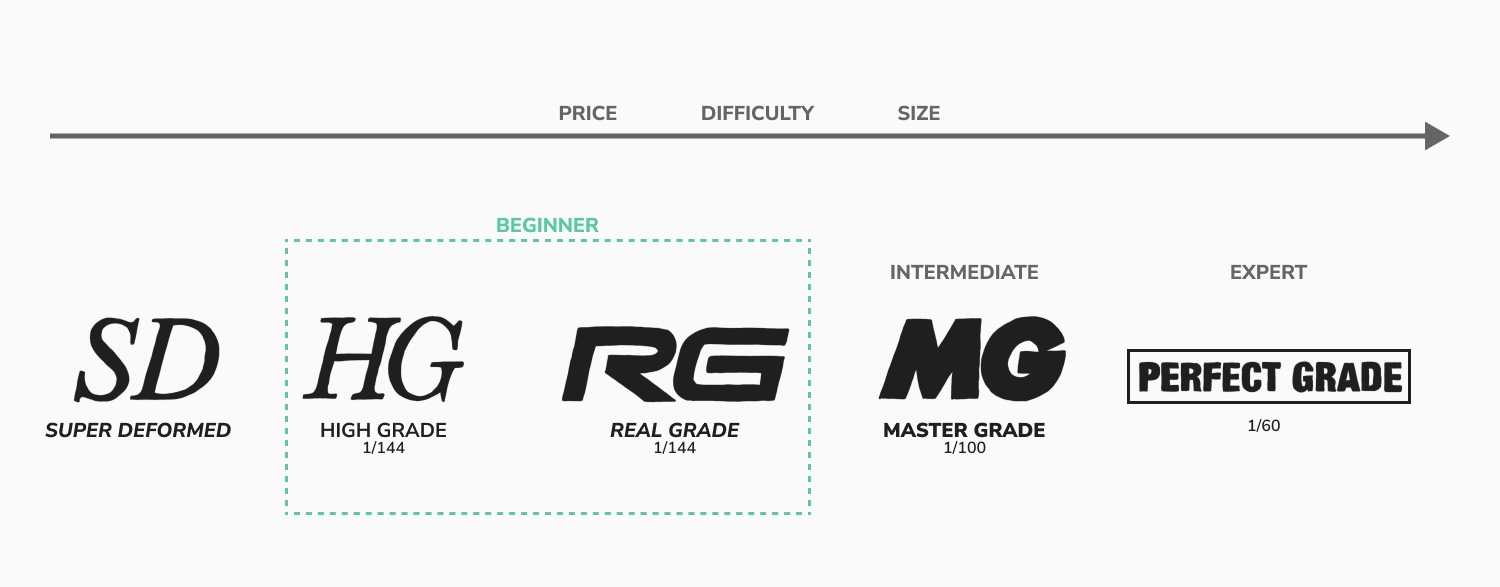
Here's a simple diagram to understand Gundam grade
Tools and Supplies
I purchased a few tools based on online recommendations and my brother's suggestions. Here are the essentials:
- The best nipper you can find
- A bent tweezer
- A hobby knife
Other tools are optional but here's the rest of the tools I used:
- Sanding papers (600, 800, 1000, 1200, 2000 grits)
- Set of Tweezers
- Cutting board as a workspace
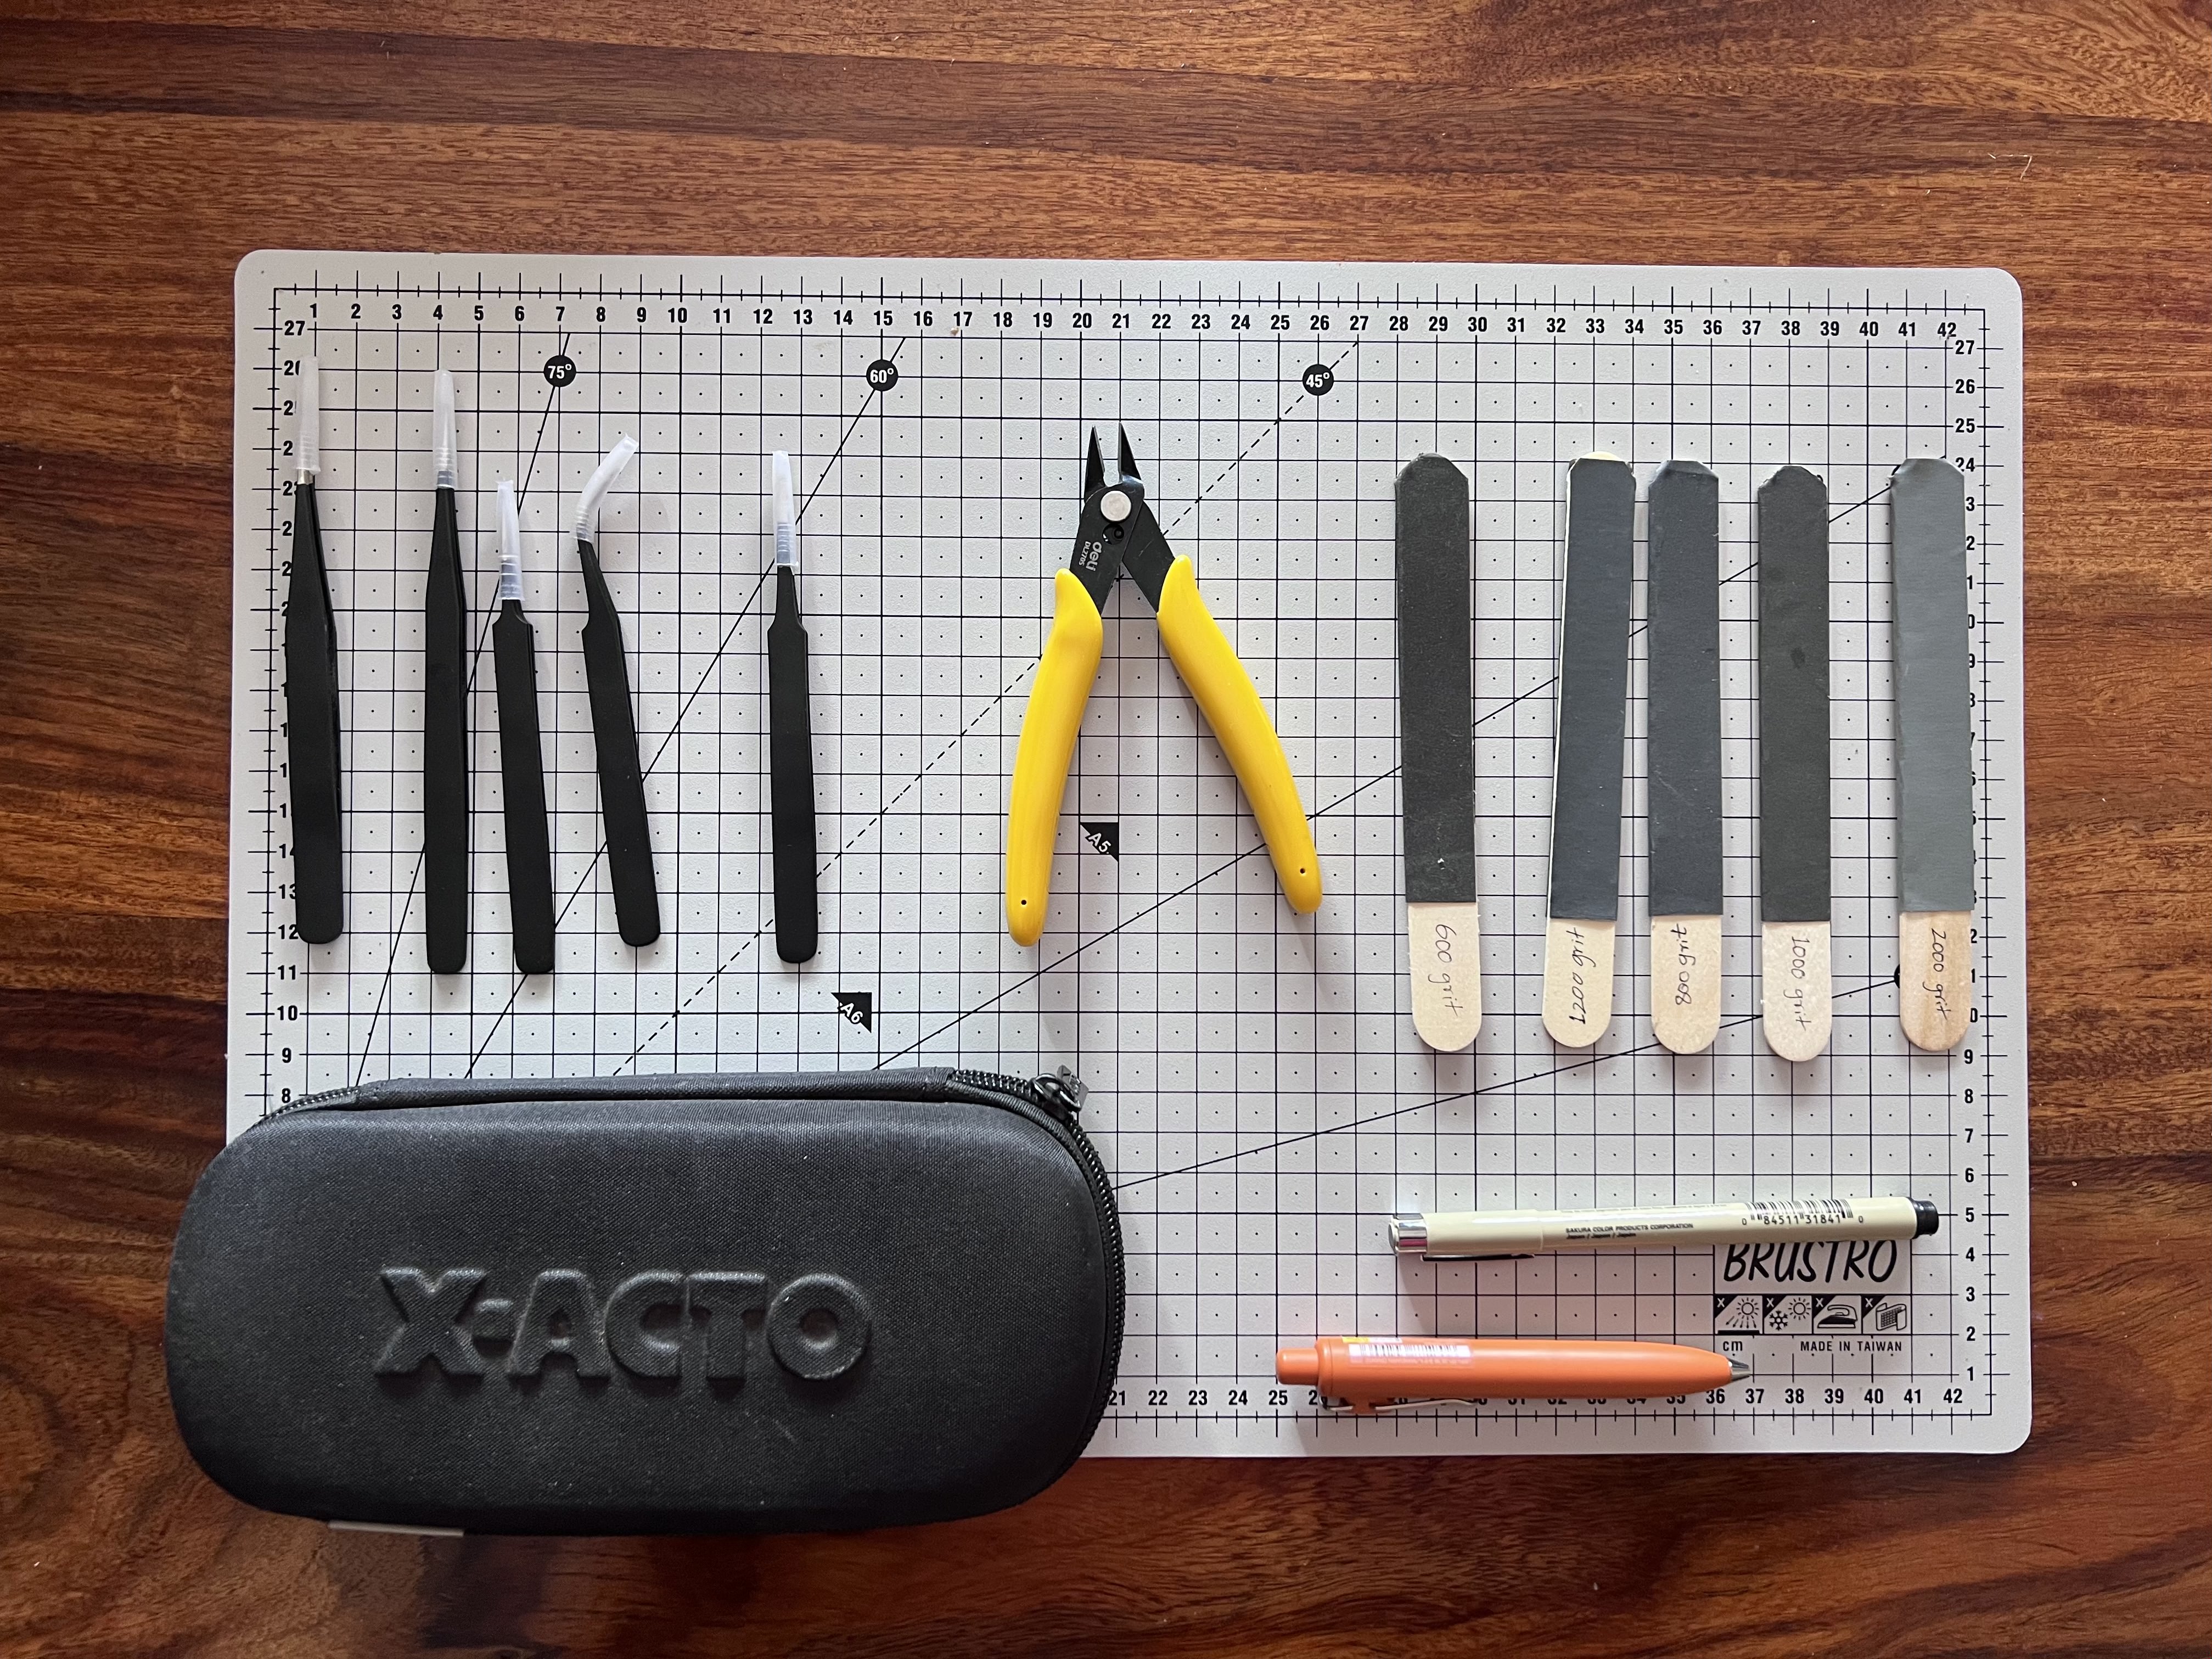
The tools that I used for this build
Building Process
1. Unboxing
Before I say anything about the unboxing experience, I must declare my love for the package design of Japanese products. It's full of information, unlike minimalist packaging which I find fatiguing.
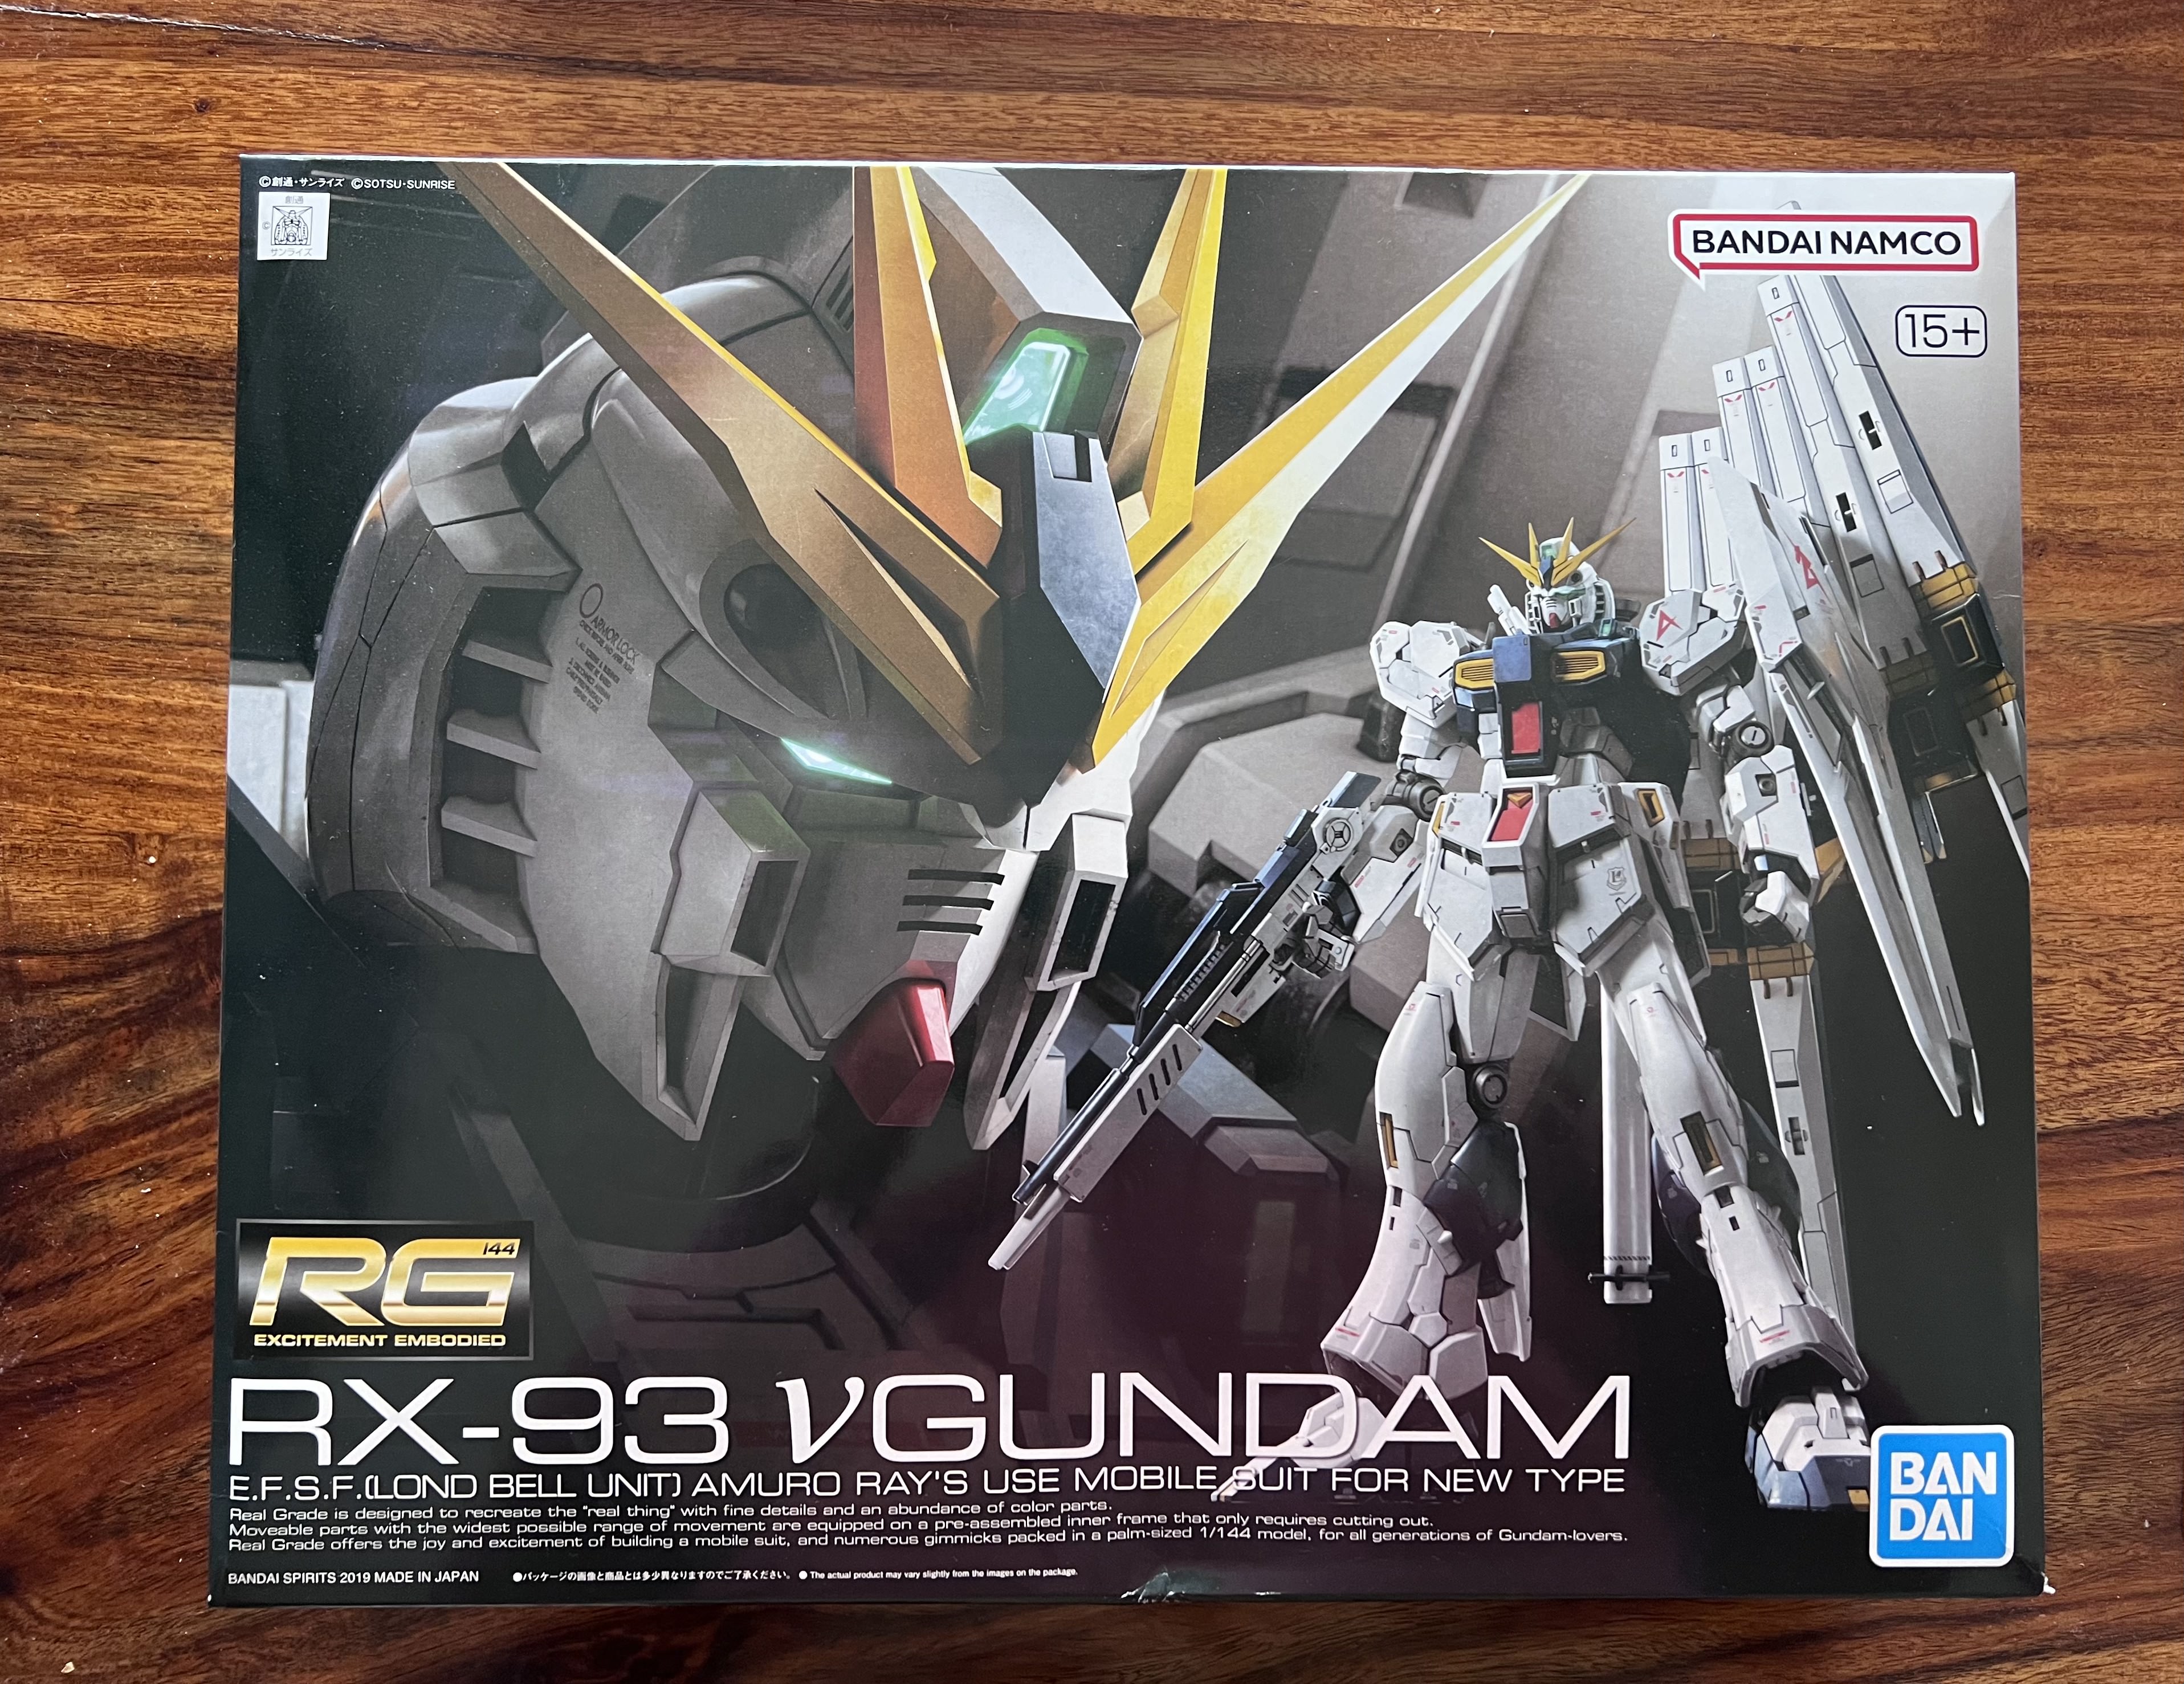
Declaring my love for this box again!
Unboxing is fairly straightforward. After removing two seals, I lifted the box to reveal multiple runners in plastic packages and a manual. At first glance, it seems like there are too many parts, but fear not. There are numbers and labels throughout the build and on the runners, so take a breather; it's not as intimidating as it seems.
2. Building Process
I don't want to go too deep into the build process, as this isn't a step-by-step guide. However, be prepared to dedicate 10-30 hours for building, depending on your focus, obsession with details, and dexterity. It took me 17 hours in total: 15 hours for building and 2 hours for stickering and final details.
Here are my few tips for building Gundam:
- Prepping the Pieces: Use a nipper to cut the plastic, a blade to remove excess plastic, and sandpaper to clean the nub marks, in that order.
- Assembly: If something doesn’t feel right, you’re likely doing it wrong. There were many instances where I had to reassemble parts because of incorrect orientation. Look for that satisfying click during assembly.
- Reading the Manual: Self-explanatory, but crucial. Read the manual carefully to avoid mistakes and understand each step thoroughly.
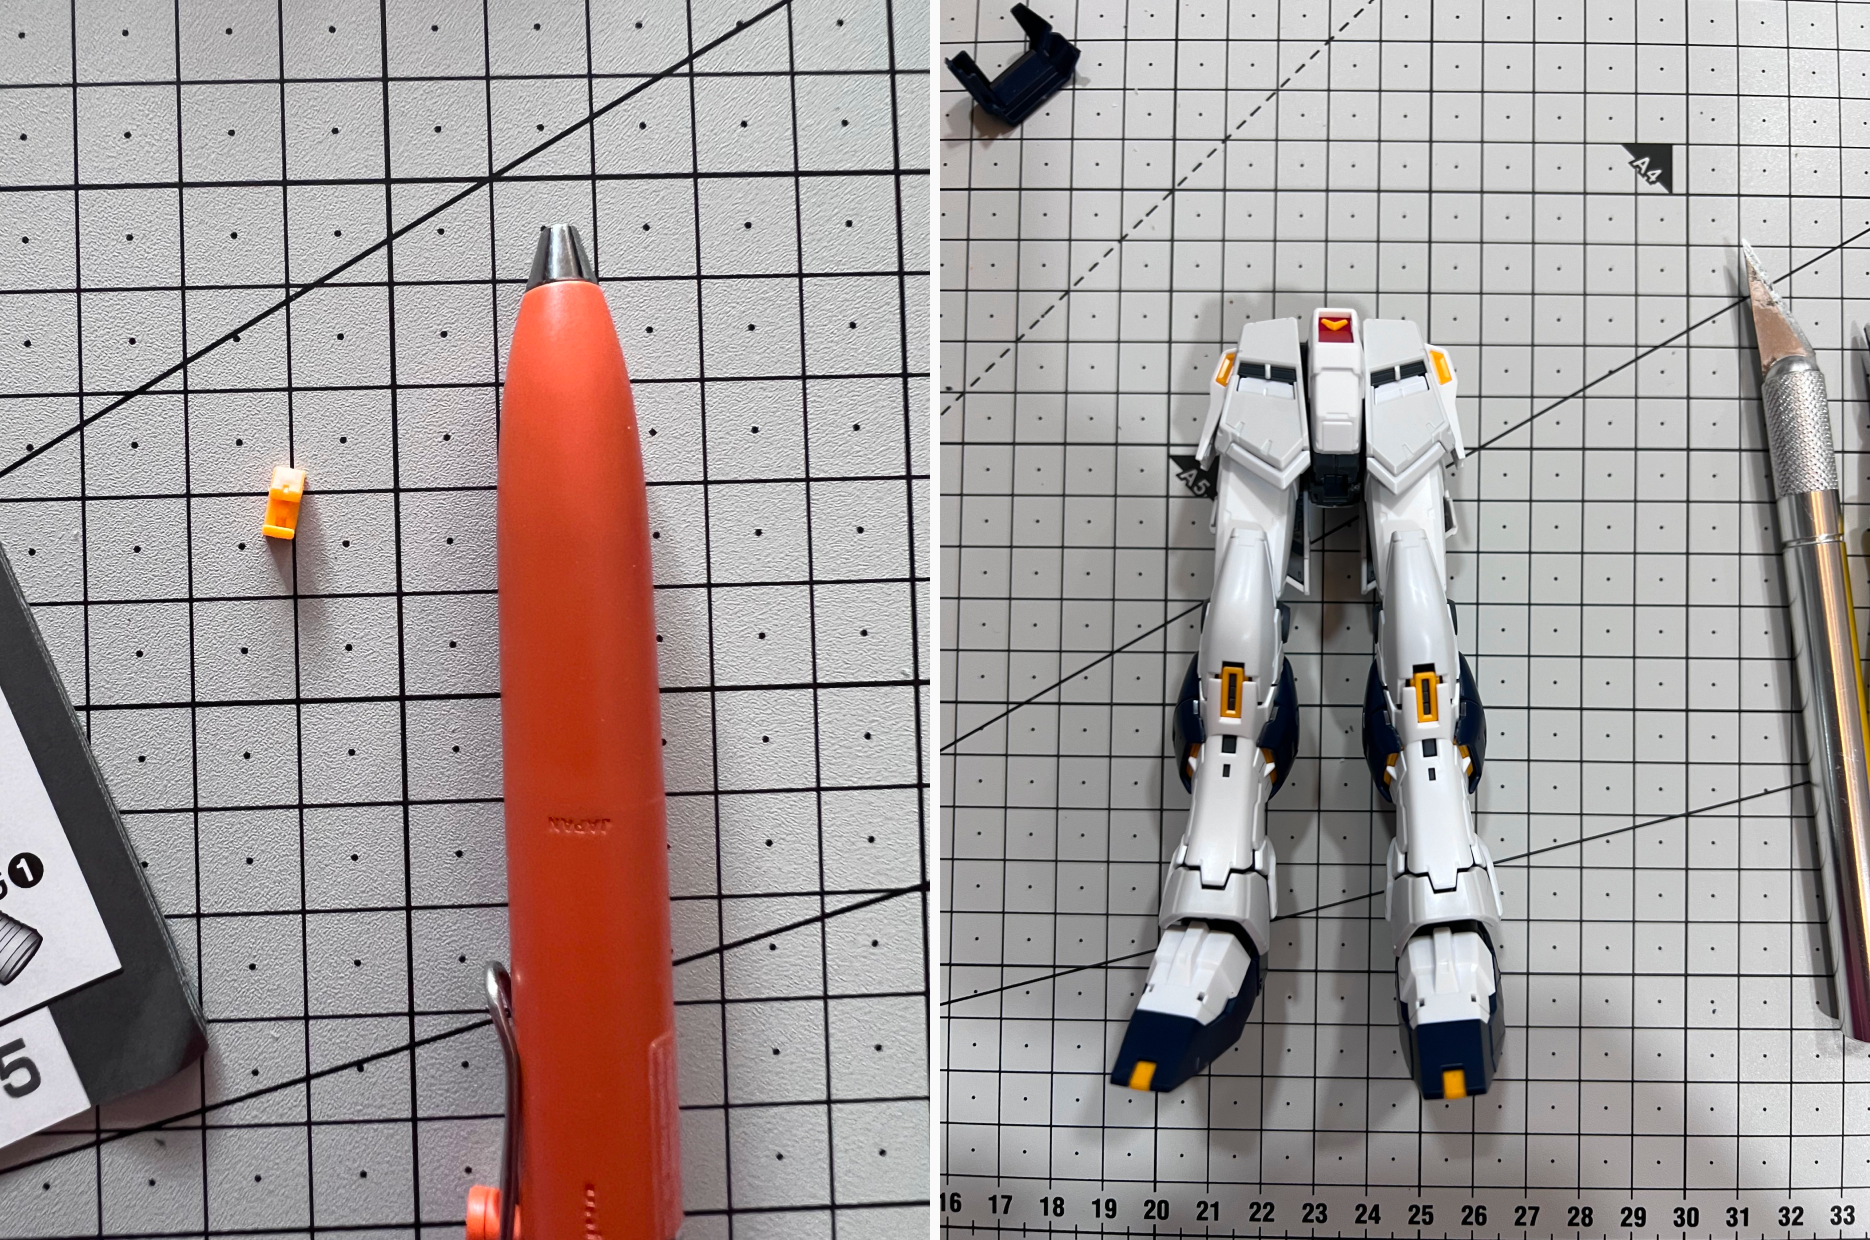
Left: One of the smallest pieces in the kit, Uniball One-P for scale Right: Half-way mark after day 1
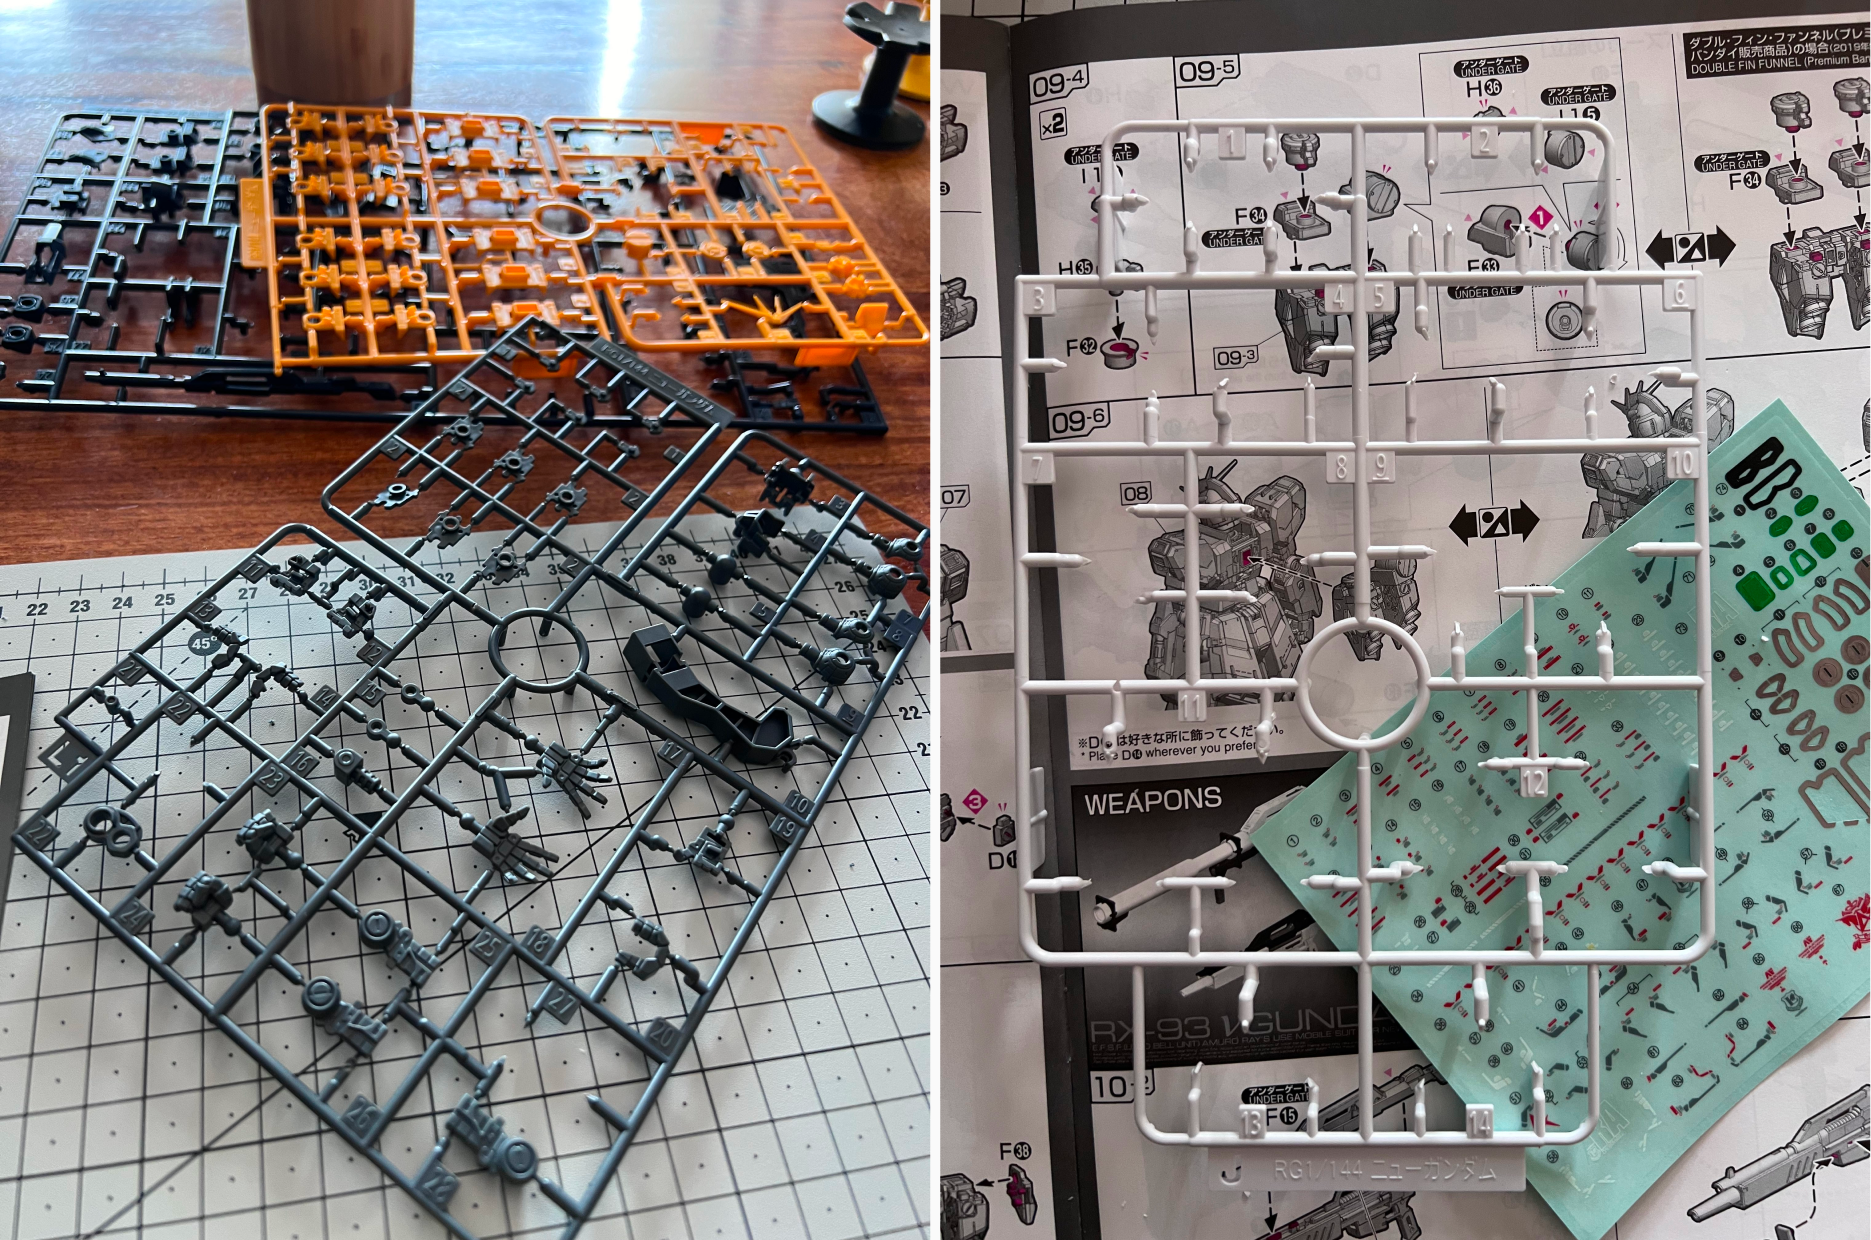
Left: Plastic runners Right: First completed plastic runner

Left: Gundam body completed Right: Distinctive fin-funnel wing that Rx-93 is known for
Finished Model
I'm still learning to pose the Gundam, but rest assured, I’ll update this post with better photos when I have them.
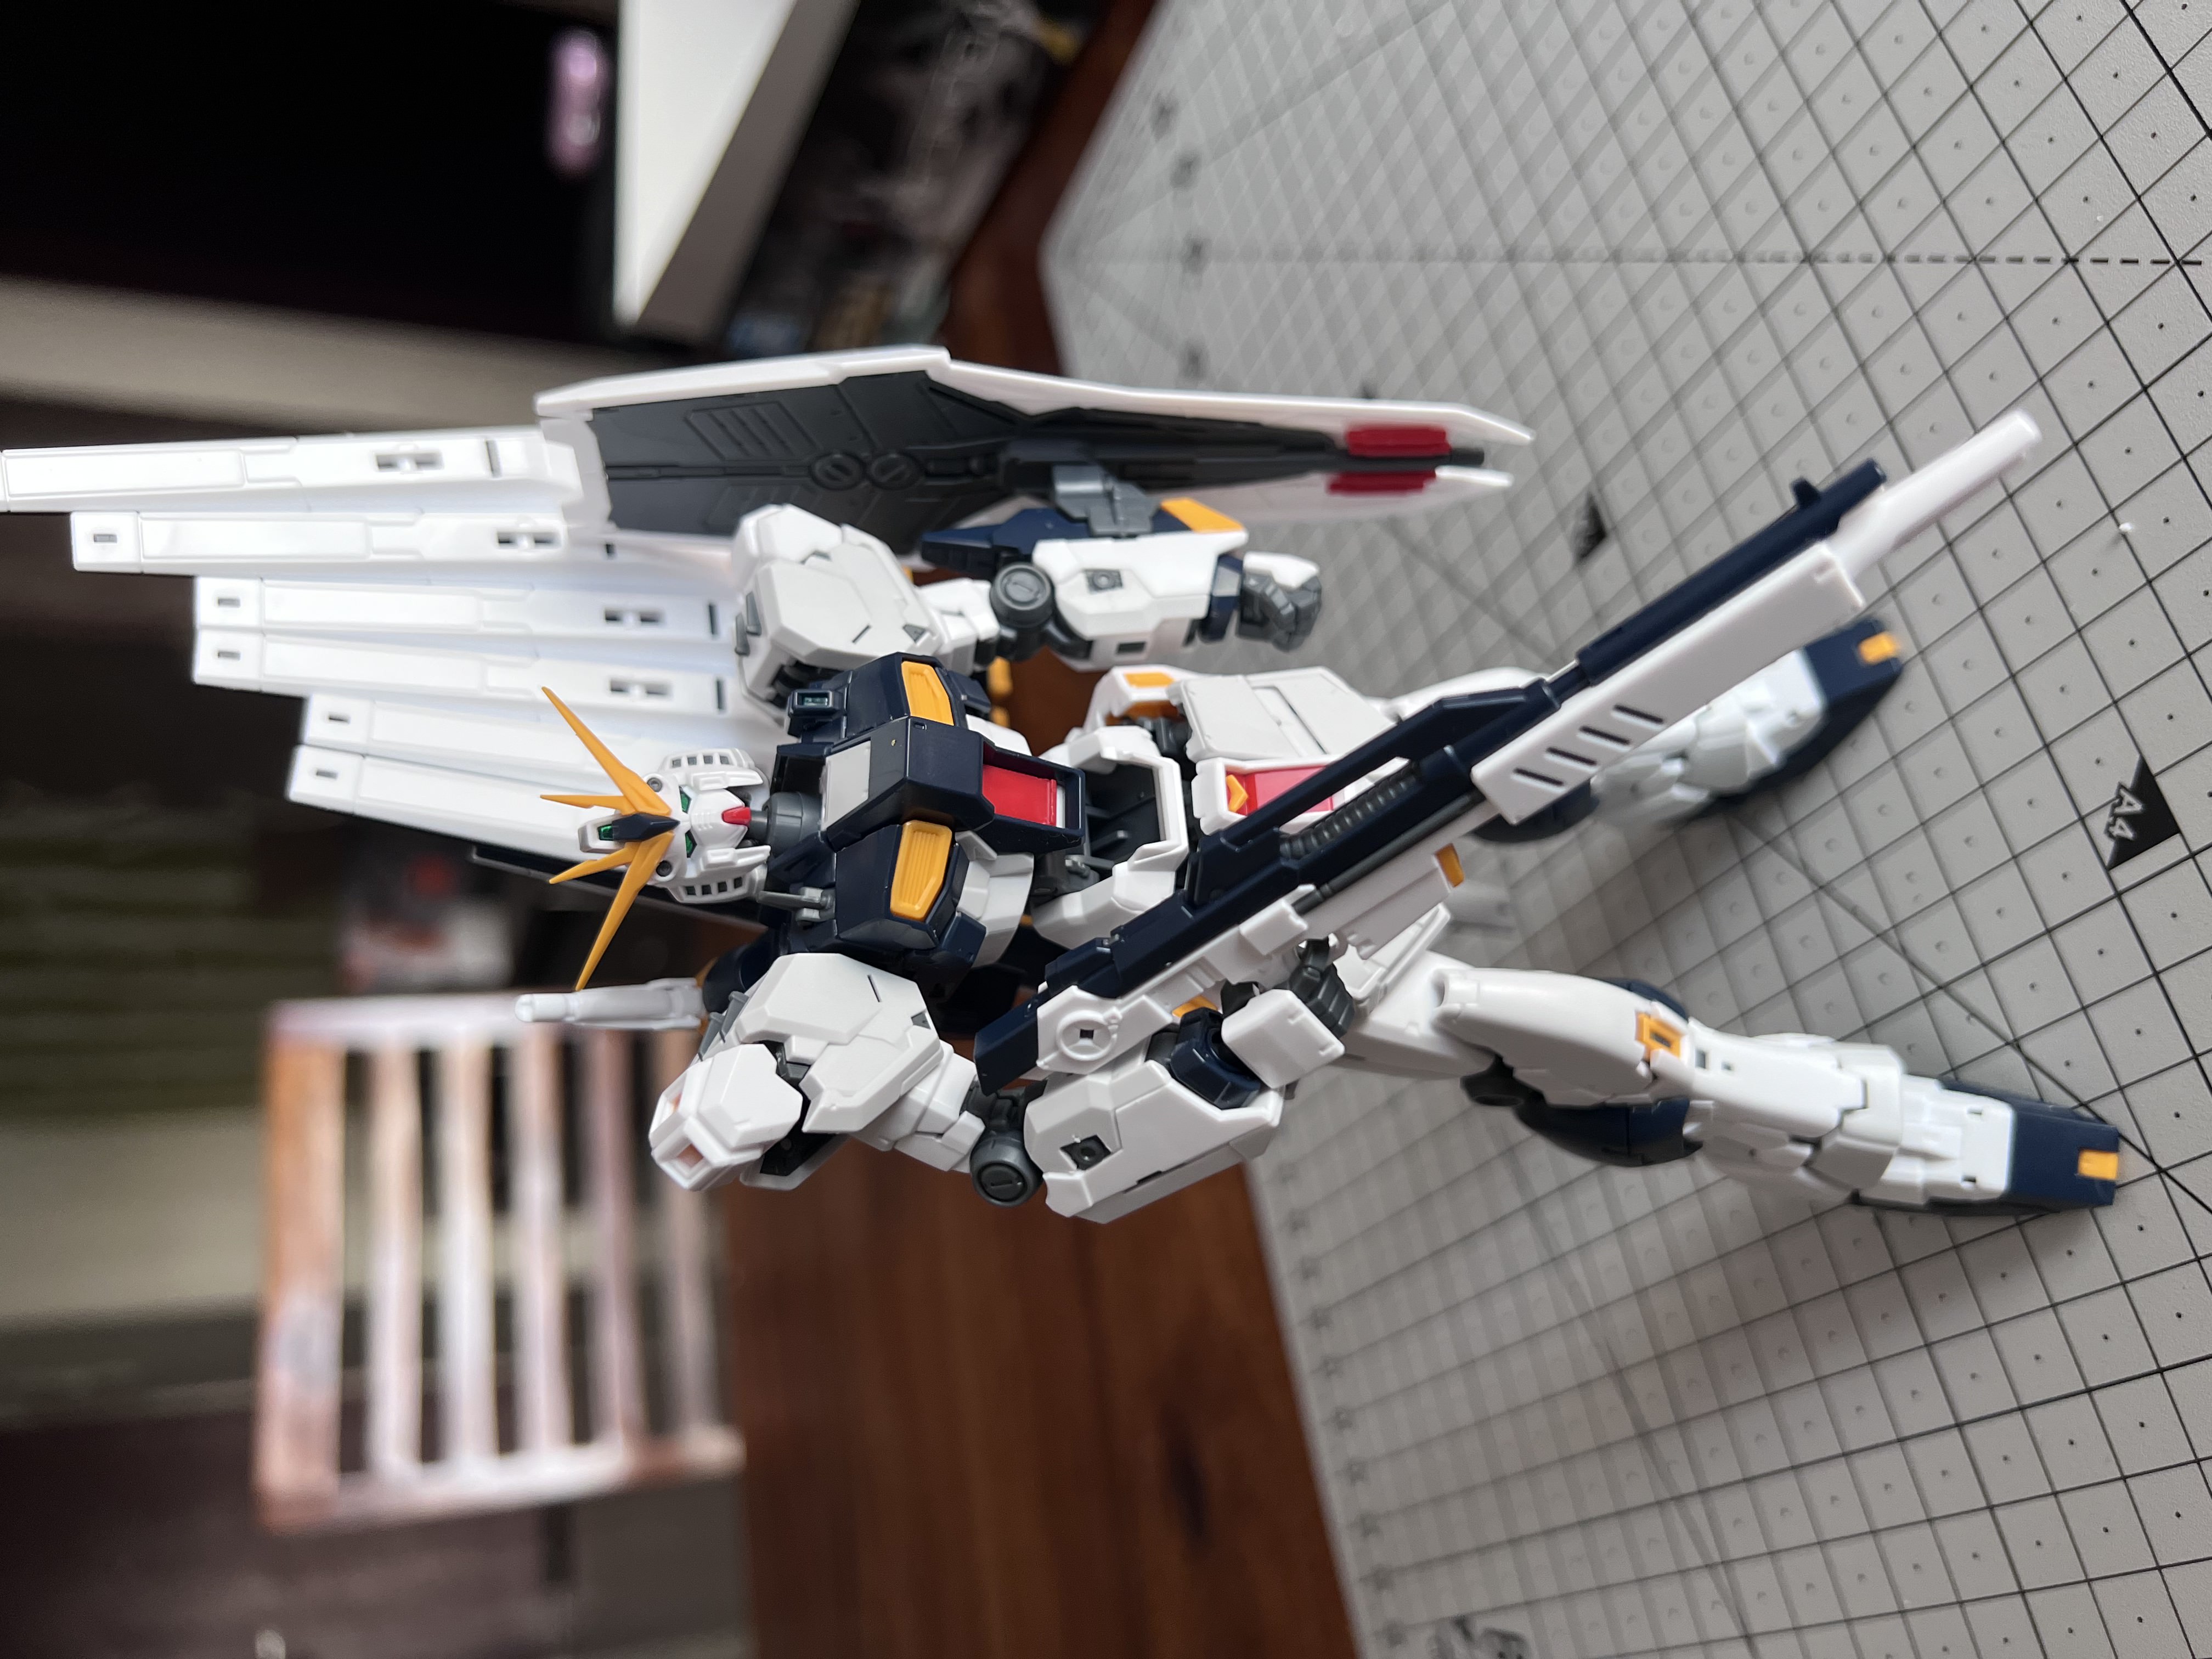
Rx-93 with Beam Rifle, sheild and fin-funnel
I loved the model when the building process was done, but it was the stickering and fine detailing that truly dialed up the build.
Reflection and My Takeaway as a Product Person
I can’t put into words how much engineering goes into making these Gundams. I’ve read online that it only gets better every year. It’s a fully articulated action figure with an inner frame built from "2-dimensional" looking, plastic runners.
The build process is carefully crafted. Here’s how it’s gamified:
- Start Simple: In Gundam's case, it’s usually the leg pieces. They’re larger and more forgiving for beginners. This part helps you get hands-on experience before the complexity increases.
- Make it Rewarding: The build is planned with checkpoints throughout. Whether you have one hour or two, you can complete a section and feel accomplished. This segmented approach keeps you motivated.
- Satisfying Clicks: Visual, audible, or tactile validation that you’re doing it right. The satisfying clicks during assembly assure you that you’re on the right track.
Final Thoughts
It took me a while to finally start my first Gundam build, but it was a highly satisfying hobby. Now, I’m waiting for the action base to ship from Japan and thinking about my next Gundam. I also plan to watch the Gundam anime sometime soon.
If you've ever considered building a Gundam or are simply curious about this hobby, I encourage you to take the leap.

Rx-93 with dual beam saber.Notice the finers details due to stickers.
If you enjoyed this post or want to know more about Gundam, please sign up for email notifications at the bottom of the screen. I hope to post again in two weeks.